

To create it, make sure you have all of this supplies:
- pallets;
- OBS panels;
- extruded polystyrene;
- nails;
- headless nails;
- screws;
- 2 mm / 0.07 inches flexible synthetic glass;
- wood impregnating agent;
- solar light
- blue painting (choose the colour you prefer);
- glue (I used Vinavil);
- clips
And all of this tools:
- jig saw;
- ruler;
- scissors;
- drill;
- table saw;
- sander / sanding paper;
- screwdriver;
- brush;
- clamp.
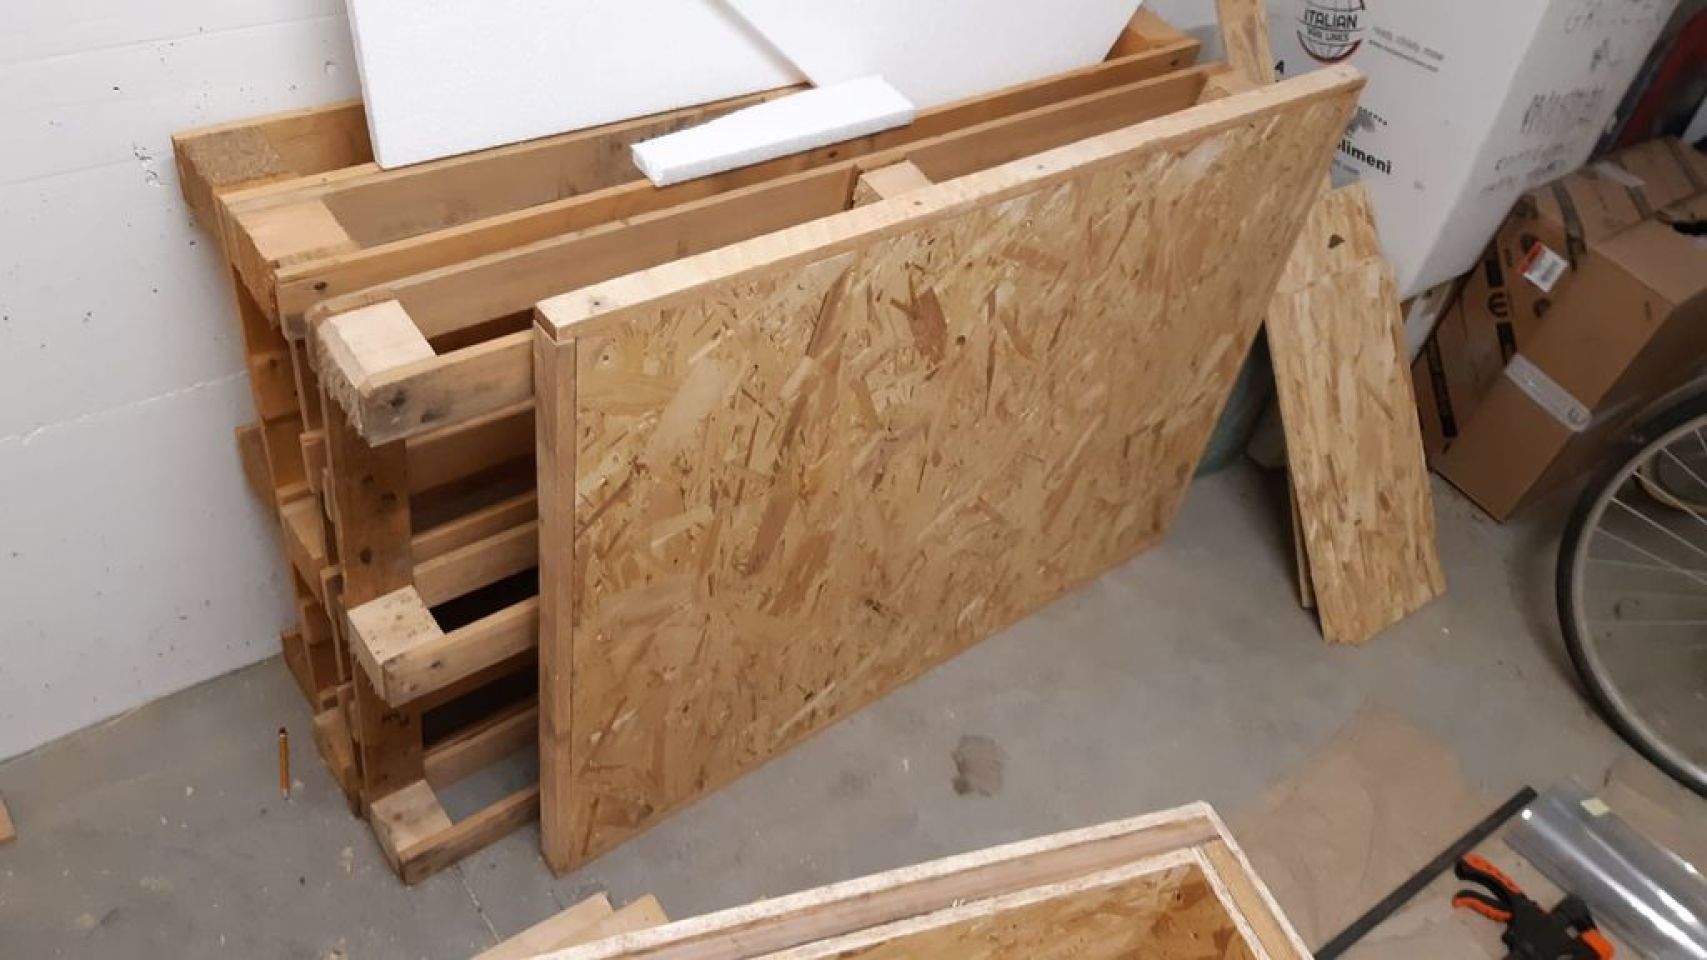
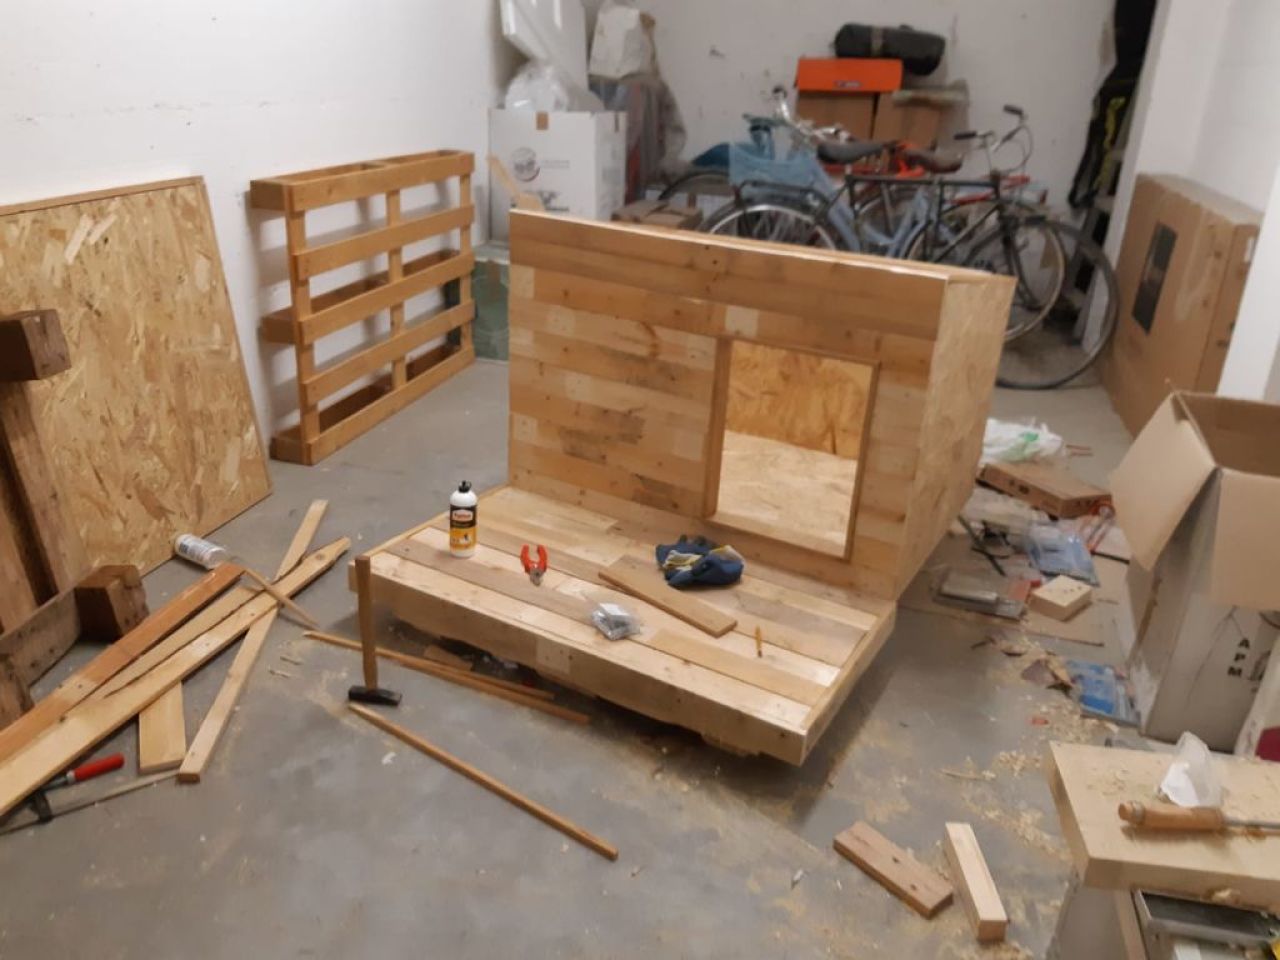
The first thing to do is to disassemble some pallets taking the boards from them.
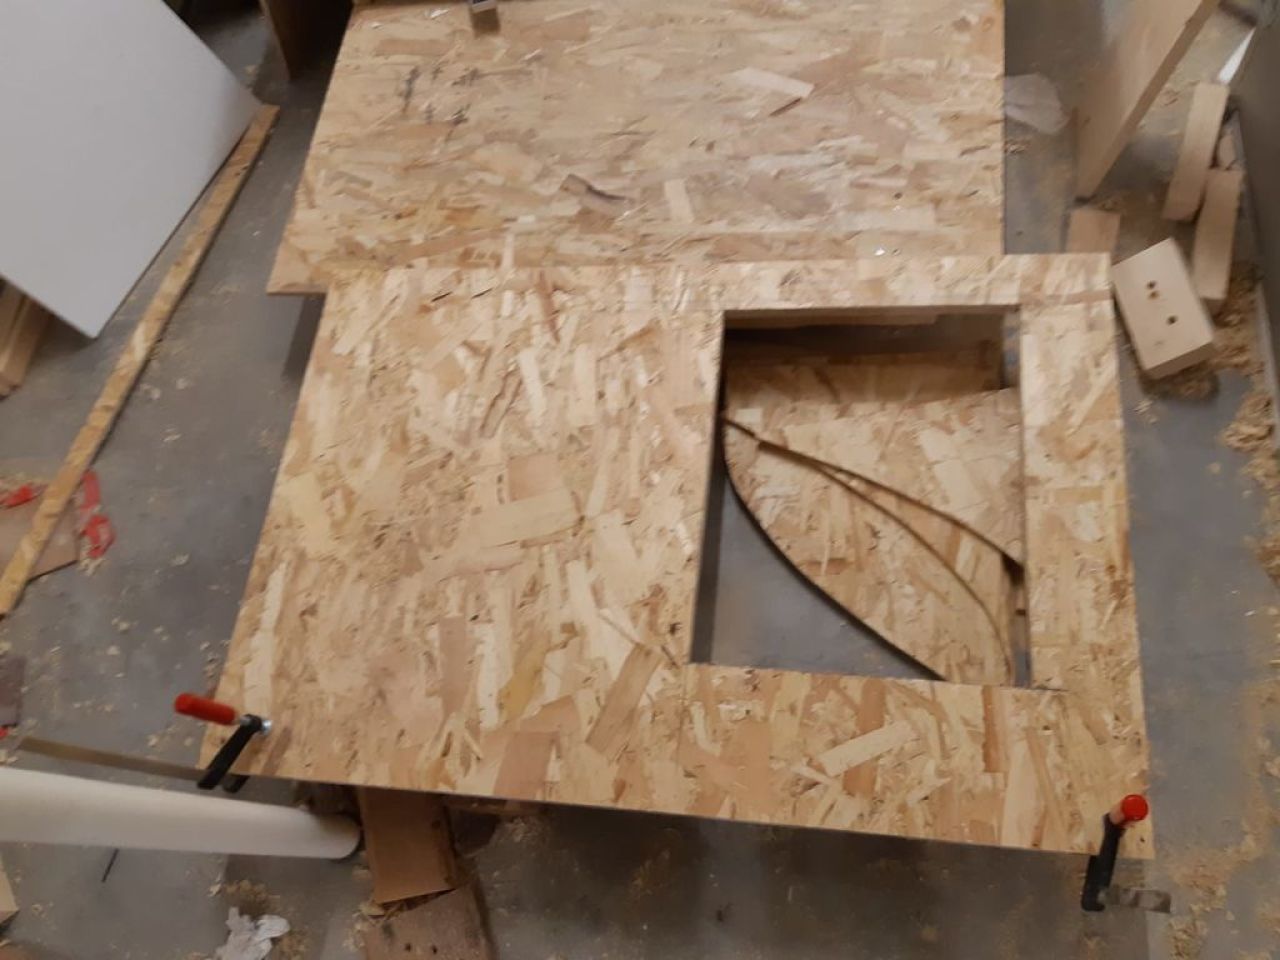
Then I designed the kennel by choosing the dimensions and cutting off the walls and the entrance. Every single wall has its "double", because lately I will create a "sandwich": two panels of wood will embed pieces of extruded polystyrene.
I removed the bottom deckboards and then I used the same pallet to lift the kennel from the ground. The pallet itself was hidden by adding 4 further boards on the sides. On the pallet I positioned an OBS panel (that it's 10 cm for side longer than the pallet). Half of this OBS panel was covered with a frame made out of pieces of the first pallet I disassembled; then the space in the centre of the frame was filled with extruded polystyrene. On top of this frame another OBS panel was positioned. On top of it I started building the external walls, supported by pieces of the first pallet we disassembled.
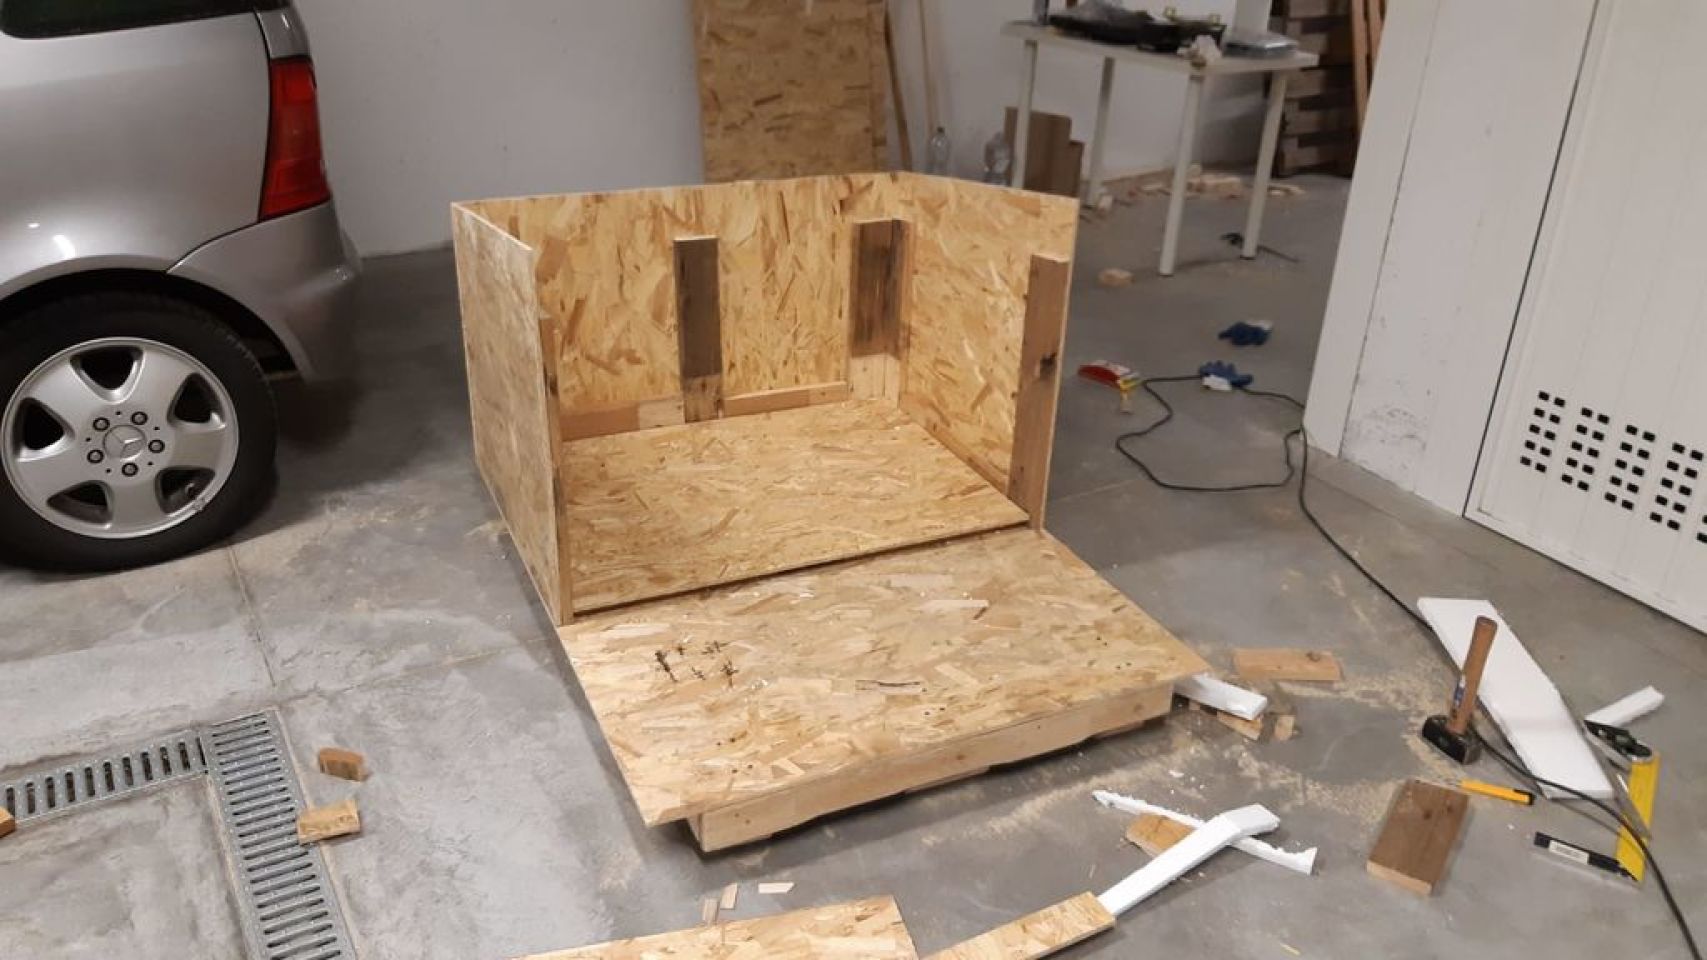
I trim the edges of the blocks that support the pallet with an angle of 45 degrees to hide them under the side panels.
Panels of extruded polystyrene were cut down and added on the external wall, but on the interior side. The main purpose of adding extruded polystyrene is to thermally insulate the kennel. The idea of creating two frames on the backwall was also used before for the floor.
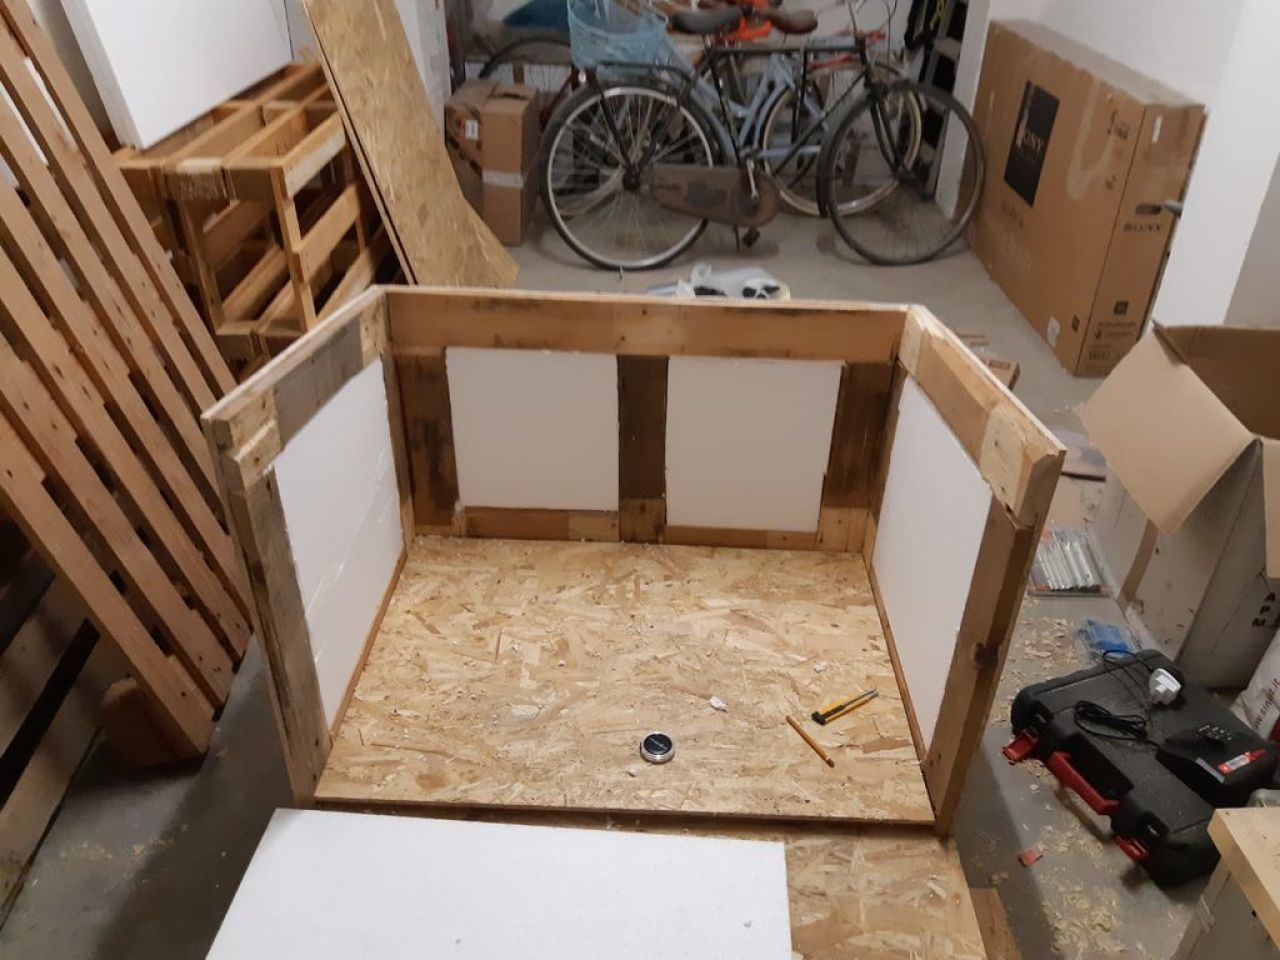
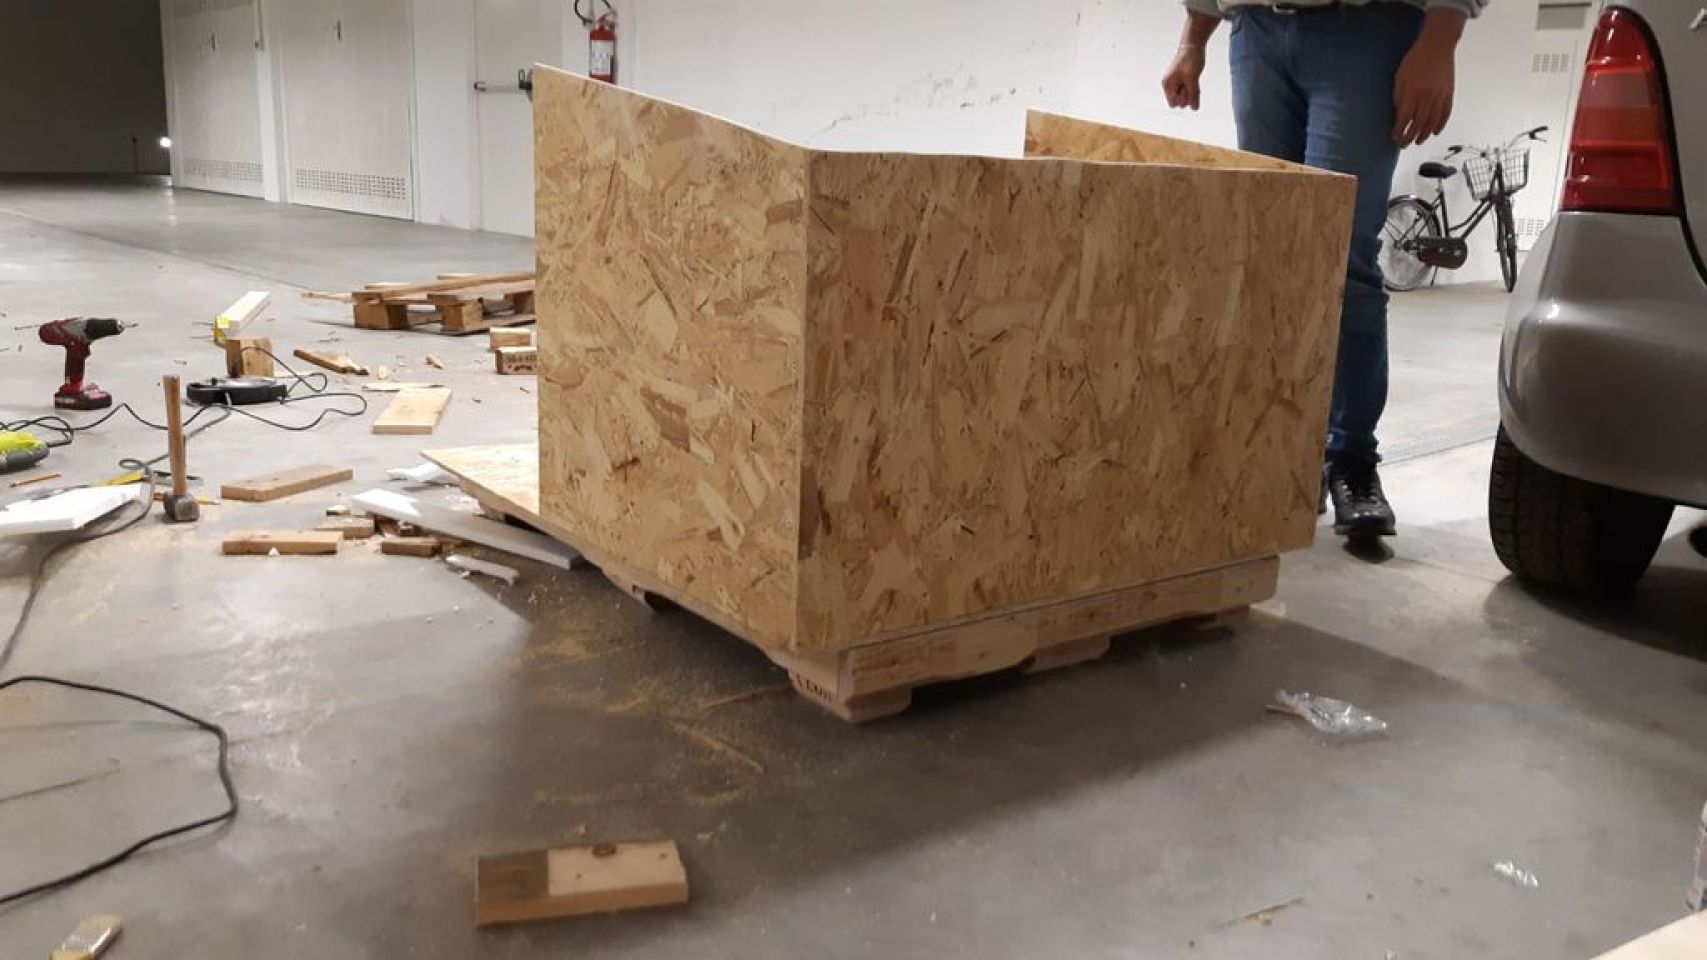
On the internal side of the kennel I added OBS panels: the internal walls.
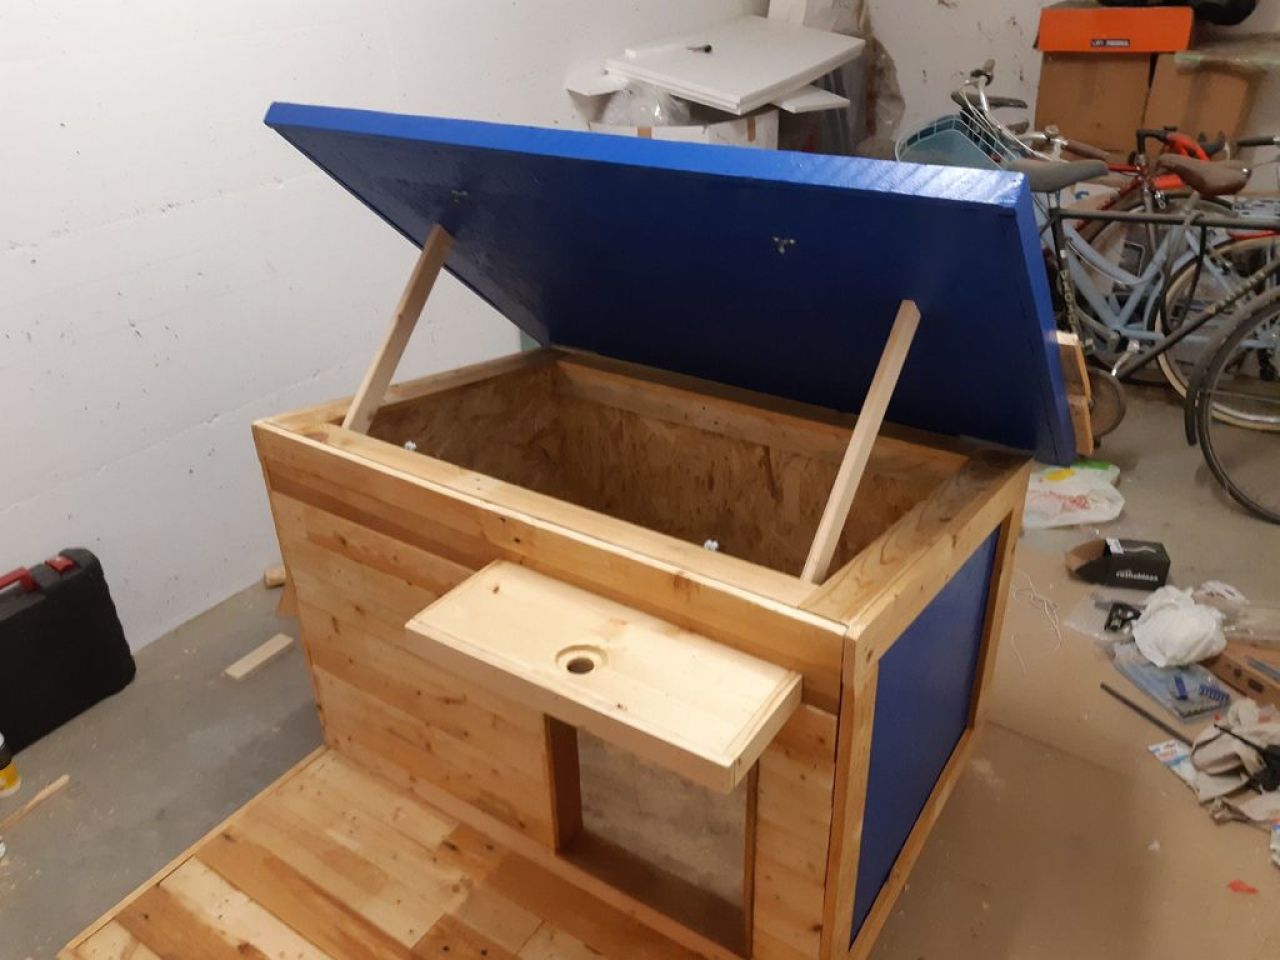
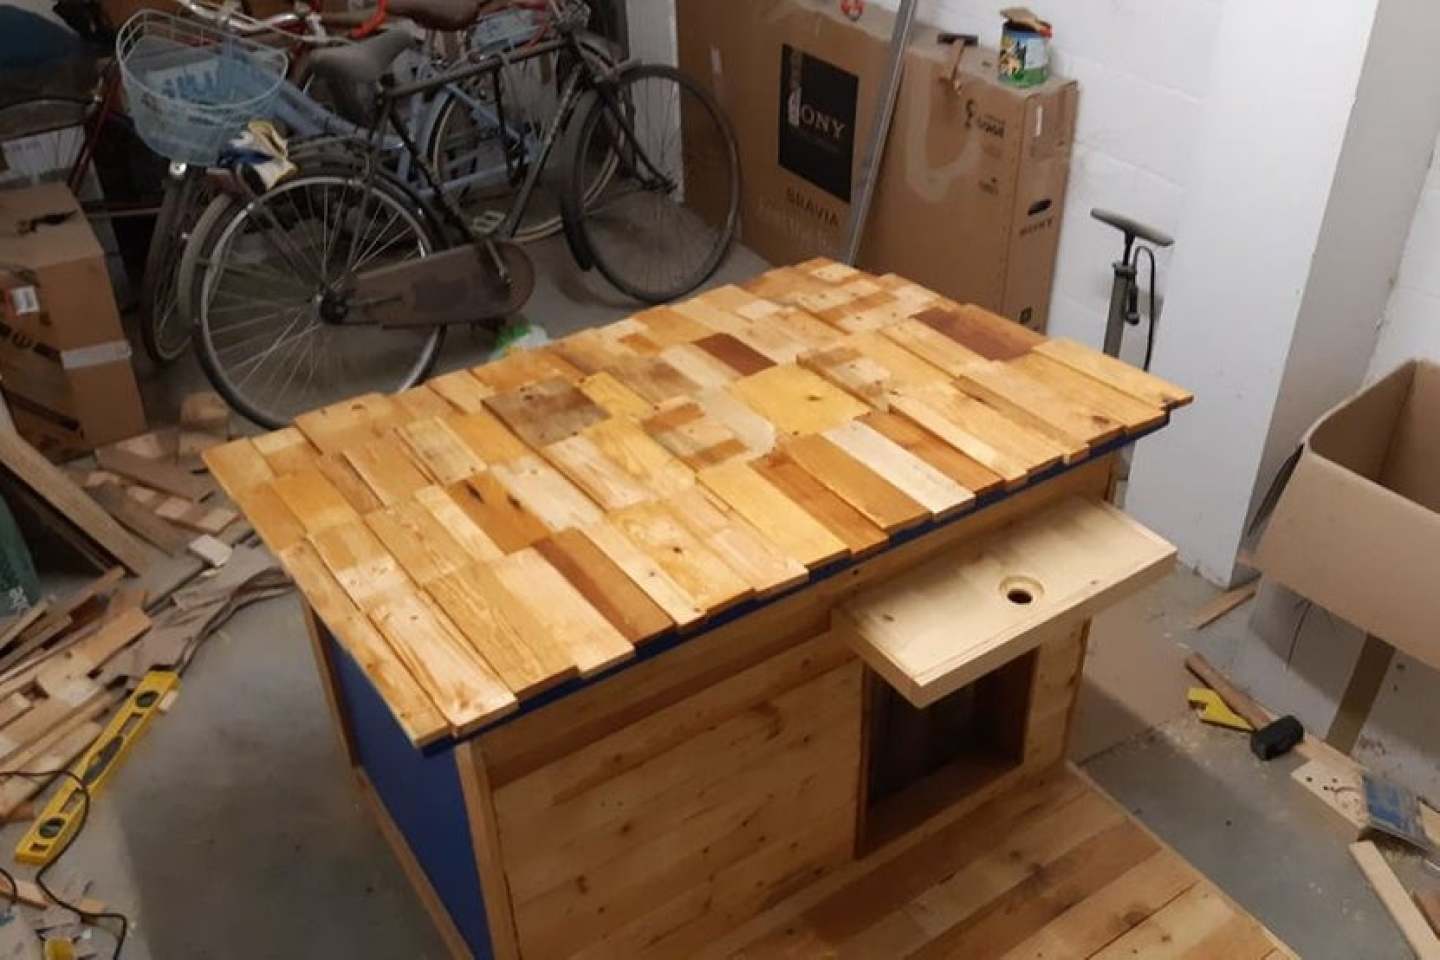
Also the roof is made out of three layers, to make it thermally insulated. Like the walls, it is painted blue. Using two hinges on the roof, it was settled on the backwall. The roof has the possibility to be opened and closed. In fact, as it is shown in the photos two long pieces of wood keep it open: they can opportunely be rotated and hidden. On the other hand, two clips keep it closed and avoid its unwanted opening.
The shingles aren't cut in a regular way. From a parallelepiped of wood (taken from the pallet I firstly disassembled) with an oblique cut two shingles can be obtained. The shingles are fixed with headless nails.
10 Comments
-

Noob 19279
 about 7 months ago
Smart design for a winter dog kennel! The irregular shingles add a touch of rustic charm, and the headless nails keep them secure. I'm sure your dog will love it!
I like that you love your dog so much 😍 Thanks for sharing!
Noob 19129
Please try a hrefhttpswwwgooglecomGooglea before asking about a hrefhttpbbsidentityvjpforumphpmodviewthreadtid2306205extraUseful Product Websitea c4aa023
Noob 19129
Please try a hrefhttpswwwgooglecomGooglea before asking about a hrefhttpsrevolutionmallcoukforumshowthreadphptid18744pid257898pid257898Awesome Product Infoa 4aa023d
Noob 19129
Please try urlhttpswwwgooglecomGoogleurl before asking about urlhttpsaptksaorgvbshowthreadphpp273272post273272High Rated Product Websiteurl 798859
Noob 19129
Please try urlhttpswwwgooglecomGoogleurl before asking about urlhttpsqualityprogamerdeforumshowthreadphptid2328pid56449pid56449Recommended Product Blogurl 59a7057
Noob 19129
Please try urlhttpswwwgooglecomGoogleurl before asking about urlhttpssternenloseuodeuevoforumviewtopicphpf40t23943p35473p35473New Product Siteurl 59a7057
Noob 19129
Please try urlhttpswwwgooglecomGoogleurl before asking about urlhttpsaptksaorgvbshowthreadphpp313347post313347Cool Product Siteurl 9e0b59a
Noob 19129
Please try urlhttpswwwgooglecomGoogleurl before asking about urlhttpsforumludokingcomindexphptopic1349newnewNew Product Tipsurl 59a7057
Noob 19129
Please try urlhttpswwwgooglecomGoogleurl before asking about urlhttpspermitbeijingcomforumshowthreadphptid668166pid2699115pid2699115Cool Product Tipsurl 79e0b59